Cleaning your mattress sounds simple and most people think a quick vacuum or spray is enough. Yet studies show mattresses can double in weight over ten years from dust mites, dead skin and trapped moisture. The real surprise is that your bed might be one of the dirtiest spots in your home and a proper deep clean could transform both your sleep and your health.
Table of Contents
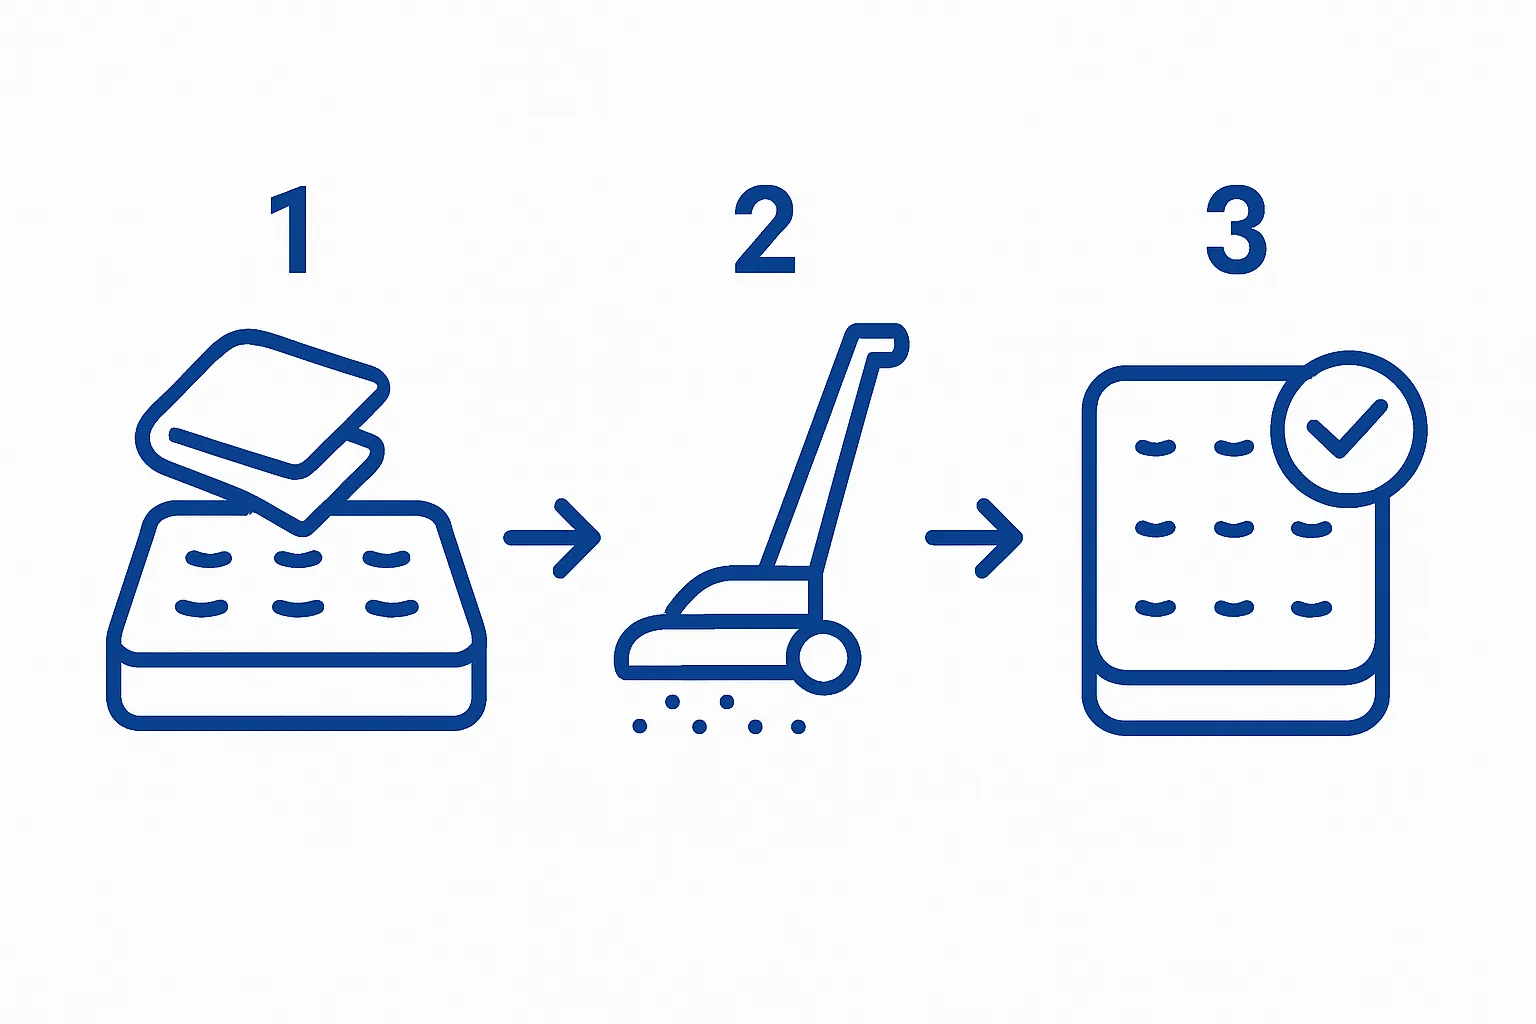
- Step 1: Gather Your Cleaning Supplies And Tools
- Step 2: Remove Bedding And Vacuum The Mattress
- Step 3: Spot Clean Stains Using Natural Solutions
- Step 4: Deodorize The Mattress With Baking Soda
- Step 5: Allow The Mattress To Dry Completely
- Step 6: Verify Cleanliness And Replace Bedding
Quick Summary
| Key Point | Explanation |
|---|---|
| 1. Gather essential cleaning supplies | Collect vacuum, white vinegar, baking soda, and soft brushes to effectively clean your mattress. |
| 2. Strip bedding and vacuum thoroughly | Remove all bedding, then vacuum the mattress to eliminate dust and allergens for better cleaning results. |
| 3. Spot clean stains with natural solutions | Use household items like vinegar and baking soda to treat specific stains gently without damaging the fabric. |
| 4. Deodorise using baking soda | Sprinkle baking soda on the mattress to neutralise odours; leave it for a few hours before vacuuming. |
| 5. Ensure complete drying before remaking bed | Thoroughly dry the mattress to prevent mould and bacteria; it should feel dry and smell fresh before adding layers. |
Step 1: Gather your cleaning supplies and tools
Before diving into mattress cleaning, preparation is key. Gathering the right supplies ensures an efficient and thorough cleaning process that protects your mattress while removing dirt, stains, and potential allergens. Your toolkit will determine how successfully you can refresh and sanitise your sleeping surface.
For optimal mattress cleaning, you will need specific tools that are gentle yet effective. Essential cleaning supplies include:
- Vacuum cleaner with upholstery attachment
- White vinegar
- Mild liquid laundry detergent
- Baking soda
- Clean white cloths or microfiber towels
- Spray bottle
- Soft-bristled brush
Choosing the right cleaning agents matters significantly. According to sleep hygiene experts, using mild, non-abrasive cleaning solutions prevents damaging your mattress fabric or compromising its structural integrity. White vinegar serves as a natural disinfectant, while baking soda helps neutralise odours without introducing harsh chemicals.
Prepare your workspace by clearing the area around your mattress and ensuring good ventilation. Lay down clean towels or drop cloths to protect surrounding surfaces from potential moisture or cleaning solution spillage. Having all your supplies organised and within reach will streamline the cleaning process and help you work methodically and efficiently.
Before starting, check your mattress manufacturer’s care instructions. Some mattresses have specific cleaning recommendations that could void warranties if not followed precisely. By gathering the right tools and understanding your mattress’s unique requirements, you will set the foundation for a successful deep cleaning session that revitalises your sleeping environment.
Step 2: Remove bedding and vacuum the mattress
Removing bedding and thoroughly vacuuming your mattress forms the crucial foundation for a deep cleaning process. This initial step eliminates loose debris, dust mites, dead skin cells, and other microscopic particles that accumulate over time, preparing the surface for more intensive cleaning techniques. According to sleep hygiene experts, regular vacuuming is essential for maintaining mattress hygiene and extending its functional lifespan.
Begin by completely stripping your bed. Remove all bedding layers including sheets, mattress protectors, and pillowcases. Take this opportunity to launder these items separately using hot water to eliminate any potential bacteria or allergens.
Pro tip: Wash your bedding at the highest temperature recommended by the fabric care label for maximum sanitisation.
Next, position your vacuum cleaner with the upholstery attachment. This specialized tool allows you to reach into the mattress’s textured surface without causing damage. Start at the top of the mattress and methodically work your way downward, using slow, overlapping strokes. Pay extra attention to seams, corners, and edges where dust and debris tend to accumulate. Critical areas to focus on include:
- Mattress seams and piping
- Corners and edges
- Areas near headboard and footboard
- Any visible surface indentations
If you want more detailed mattress care instructions, our comprehensive guide can provide additional insights. The vacuuming process should take approximately 10-15 minutes to ensure thorough cleaning. Listen for changes in the vacuum’s sound which can indicate areas with more concentrated debris. Once completed, your mattress surface will feel fresher and be primed for the next cleaning stages.
Verify your work by running a clean white cloth over the mattress surface after vacuuming. If the cloth remains relatively clean, you have successfully removed most surface-level contaminants and are ready to proceed with deeper cleaning techniques.
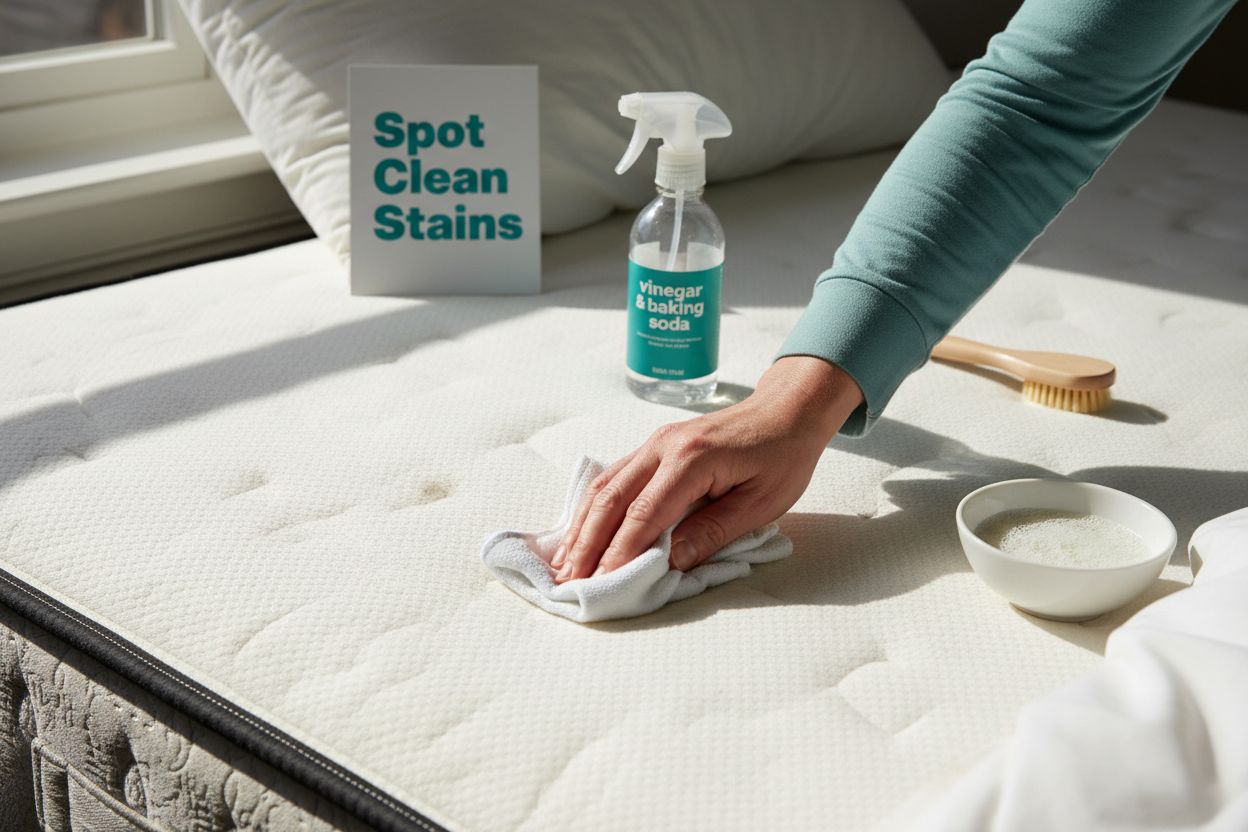
Step 3: Spot clean stains using natural solutions
Spot cleaning is a targeted approach to managing specific stains without compromising your entire mattress. Different stains require unique treatment strategies, and understanding how to address them naturally prevents potential damage and chemical buildup. According to cleaning experts, the key is gentle treatment and immediate action.
Important cleaning principle: Always blot stains instead of rubbing, which can spread the contamination and drive the substance deeper into the mattress fabric. Your goal is to lift the stain without saturating the mattress material. Prepare a gentle cleaning solution using household ingredients like white vinegar, hydrogen peroxide, and baking soda.
For protein-based stains such as sweat, blood, or bodily fluids, create a specialized cleaning mixture. Combine equal parts cold water and hydrogen peroxide with a small amount of salt. Apply the solution sparingly using a clean white cloth, working from the stain’s outer edges toward the center to prevent spreading. Let the solution sit for approximately 15 minutes before blotting dry with a clean towel.
Specific stain treatment techniques include:
- Blood stains: Use cold water and hydrogen peroxide
- Urine stains: Combine white vinegar and water
- Sweat marks: Baking soda and hydrogen peroxide solution
- Food or drink spills: Mild dish soap with cold water
If you want comprehensive mattress maintenance advice, our detailed guide offers additional insights. After treating the stain, allow the mattress to air dry completely. Direct sunlight can help naturally disinfect and eliminate any remaining moisture. Avoid using a hairdryer or applying direct heat, which might set the stain permanently or damage the mattress fabric.
Verify your cleaning effectiveness by checking that the stained area looks lighter and the fabric texture remains consistent. A properly treated stain should not leave a visible mark or change the mattress’s original color and texture.
Step 4: Deodorize the mattress with baking soda
Deodorising your mattress is a critical step in maintaining a fresh and hygienic sleeping environment. Baking soda serves as a powerful natural deodoriser that neutralises odours without introducing harsh chemicals. According to sleep hygiene experts, this simple technique can effectively absorb moisture and eliminate unwanted smells that accumulate over time.
Preparation is key when applying baking soda. Ensure your mattress is completely dry from previous cleaning steps. Open windows or use fans to increase air circulation, creating an optimal environment for the deodorising process. Choose a time when you can leave the mattress undisturbed for several hours, ideally during daylight when sunlight can provide additional natural sanitisation.
Sprinkle a generous, even layer of baking soda across the entire mattress surface. Use a fine-mesh sieve or your hands to distribute the powder uniformly, ensuring complete coverage. Pro technique: Gently work the baking soda into the mattress fabric using a soft-bristled brush, which helps the powder penetrate deeper and enhance its odour-absorbing capabilities.
Key considerations for effective deodorisation include:
- Cover the entire mattress surface
- Use approximately 1 cup of baking soda per mattress
- Allow 2-4 hours of sitting time
- Avoid walking on or disturbing the mattress during treatment
If you want to explore additional mattress protection methods, our comprehensive guide offers valuable insights. After the designated sitting time, use your vacuum cleaner with an upholstery attachment to thoroughly remove the baking soda. Work methodically, ensuring no powder remains trapped in the mattress fabric.
Verify the effectiveness of your deodorising treatment by checking for a neutral, clean scent. The mattress should feel fresh and free from any previous odours. If slight smells persist, repeat the process or consider consulting professional cleaning services for more intensive treatment.
Step 5: Allow the mattress to dry completely
Drying your mattress thoroughly is a critical final step in the cleaning process that prevents potential mold, mildew, and bacterial growth. Moisture trapped within mattress layers can create a breeding ground for harmful microorganisms, compromising both your mattress’s longevity and your health. According to sleep hygiene experts, proper drying is just as important as the cleaning itself.
Maximise air circulation by positioning your mattress in a well-ventilated area. Open windows wide and use multiple fans to create cross-ventilation. If possible, place the mattress near a sunny window, as direct sunlight provides natural disinfection and helps accelerate the drying process. Avoid using heated devices like hairdryers, which can damage mattress fabric and create uneven drying.
The duration of drying depends on several factors, including room humidity, mattress thickness, and cleaning method used. Typical drying times range from 4 to 8 hours, but thicker mattresses or humid environments might require longer. Patience is key during this stage. Resist the temptation to rush the process by covering the mattress or adding bedding prematurely.
Critical drying indicators to monitor include:
- Complete absence of moisture when touched
- No musty or damp odors
- Consistent fabric texture across the surface
- No visible wet spots or discoloration
If you want to protect your mattress after cleaning, consider investing in a quality mattress protector. This additional layer can help maintain your mattress’s cleanliness and prevent future stains.
Verify the mattress is completely dry by performing a simple touch test. The surface should feel completely dry and return to its original texture. If any area feels cool or slightly damp, continue air-drying. Only once the mattress is entirely dry should you remake your bed with fresh linens, ensuring a clean, hygienic sleeping environment.
Step 6: Verify cleanliness and replace bedding
The final stage of mattress cleaning involves a meticulous verification process and thoughtful bedding replacement. This crucial step ensures that all your previous cleaning efforts have successfully transformed your mattress into a fresh, hygienic sleeping surface. According to sleep hygiene experts, proper final inspection and bedding selection can significantly enhance your sleep environment.
Comprehensive cleanliness verification requires a systematic approach. Begin by performing a visual and sensory inspection of the entire mattress surface. Look for any remaining stains, check fabric texture, and ensure there are no lingering odors. Run your hands across the surface to confirm complete dryness and smoothness. Key verification indicators include consistent color, absence of moisture, and a neutral, clean scent.
Selecting appropriate bedding is equally important after a thorough mattress cleaning. Choose freshly laundered, high-quality sheets that complement your newly cleaned surface. Recommended bedding practices involve using breathable, natural fabrics that promote air circulation and moisture wicking. Cotton and bamboo materials are excellent choices for maintaining mattress hygiene and personal comfort.
Essential bedding replacement criteria:
- Use clean, recently washed sheets
- Select fitted sheets that match mattress dimensions
- Opt for breathable, natural fabric materials
- Ensure complete mattress coverage
If you want to explore optimal bed sheet maintenance, our comprehensive guide offers valuable insights. Consider adding a mattress protector as an additional layer of defence against future stains and dust accumulation. These protective covers create a barrier between your clean mattress and potential contaminants.
Final verification involves making the bed and conducting a last sensory check. Lie down and assess the mattress feel, noting any improvements in comfort or freshness.
Here is a checklist table to help you verify if your mattress is clean, dry, and ready for use after cleaning.
| Verification Step | What to Check For | How to Confirm |
|---|---|---|
| Visual Inspection | No visible stains or marks | Surface looks consistent in colour and clean |
| Dryness Check | Complete absence of moisture | Touch across the mattress feels dry everywhere |
| Smell Test | No musty, damp, or chemical odours | Mattress has a neutral, clean scent |
| Texture Assessment | Uniform fabric texture | No rough, damp, or unevenly textured areas |
| Bedding Preparation | Use clean, freshly laundered sheets | Bedding feels fresh, fits well, and covers the mattress fully |
| Final Comfort Check | Improved comfort and freshness when lying down | Surface feels welcoming and inviting for sleep |
Protect Your Freshly Cleaned Mattress for Lasting Comfort
You have spent valuable time and effort learning how to clean your mattress for a healthier sleep. But after removing stains and odours, one challenge remains – how do you keep your mattress feeling and smelling fresh for the long term? Regular cleaning is important, yet everyday spills and dust can undo your hard work quickly. This is where added mattress protection makes all the difference. By using specialised mattress protectors, you create a barrier that shields your mattress from future stains, sweat and allergens.

Make your cleaning efforts last. Enhance your sleep hygiene while preserving the comfort and longevity of your bed. Browse our full range of mattress protectors and accessories at Comfy Beds to find the perfect fit for your home. Secure your fresh start today so you can enjoy healthier, undisturbed rest every night.
Frequently Asked Questions
How often should I clean my mattress?
It is recommended to clean your mattress every six months to maintain hygiene and prolong its lifespan. Regular vacuuming and spot cleaning can be done as needed in between deep cleanings.
What natural solutions can I use for spot cleaning stains on my mattress?
You can use a mixture of hydrogen peroxide, cold water, and salt for protein-based stains like sweat or blood. For urine stains, a combination of white vinegar and water works effectively.
How do I effectively deodorise my mattress?
To deodorise your mattress, sprinkle a generous layer of baking soda over the entire surface, let it sit for 2-4 hours, and then vacuum it off. This helps neutralise odours without harsh chemicals.
Why is it important to allow the mattress to dry completely after cleaning?
Allowing your mattress to dry completely is crucial to prevent the growth of mould, mildew, and bacteria, which can occur when moisture is trapped inside the mattress layers.
